Monday, September 7, 2015

Stranded Knitting in Four Easy Lessons

I started writing this post about stranded knitting (AKA Fair Isle knitting) mumblety years ago. Since then, I've knit several stranded knitting projects, including more advanced techniques, such as using more than two colors, and steeking. I guess it's about time to share what I learned.

My first project was a little case for my mp3 player. (Yes, I started this post so long ago, I actually owned and used an mp3 player because my cell phone didn't have  the memory capacity to hold my favorite playlist!) I learned a few things from that project, most notably that tight floats can make your project too small, and that there are several ways to hold two different yarn strands while knitting.

Lesson #1: Avoiding tight floats
To avoid tight floats in stranded knitting, after you've cast on, joined in the round, and knit a row or two, let the knitting turn inside out. Stranded knitting is typically done in stockinette, which naturally wants to curl. The result of doing this will be that you are still knitting (as opposed to purling) every stitch, but you'll be working on the needle that is in the back, with rest of the work hanging down in front of it. It's a little strange at first, but you get used to it. The floats will be on the outside, which has a slightly greater circumference. When you finish and turn the knitting right-side-out again, your floats will be looser than if you had knit right-side-out the whole time.

Lesson #2: Holding two working yarn strands
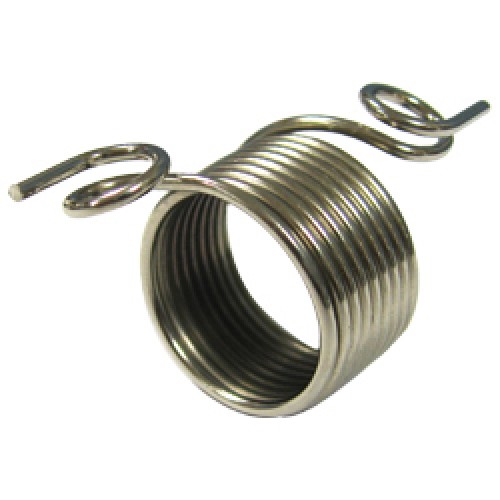
A Norwegian thimble
If you already know how to knit both "English-style" (holding the yarn in your right hand) and "continental-style" (holding the yarn in your left hand), you are ahead of the game here. The easiest way to keep two strands of working yarn separated while easily accessible for knitting is to have one in your left hand and the other in your right. When you're knitting the color in the left hand, you work continental-style, and when you're knitting the color in the right hand, you work English-style. I knit continental, and no matter how I tried, holding yarn in my right hand just feels awkward and wrong to me. So I always keep both working yarn strands in my left hand. The two yarn strands would often wrap around each other, making it difficult to grab just one of them with the needle and difficult to adjust the tension on the strand being knitted without also pulling the other strand. I tried using a nifty device called a Norwegian thimble that sits on the finger and has loops for 2 strands of yarn. It worked well, but it was cumbersome to put on and take off and load or unload the yarn strands.

In the end, I came up with a method of holding the yarn with my left hand that keeps the strands separated, doesn't use any device, and with some practice, can be done quickly. See the picture on the right. Both strands go around my left pinky from front to back and then up along my palm. One strand then goes out between my ring finger and middle finger, and the other goes out between the middle finger and index finger. The end result is that my middle finger keeps the two strands separated. When I'm knitting (as opposed to taking photographs of my own hands), I bend the index finger so that the knuckle is between the two strands of yarn, which makes it fairly easy to grab one with my needle without grabbing the other.

My next stranded knitting project was a pair of socks sold as a kit, with the pattern and all the yarn included. It involved 5 different colors of yarn, but no more than two colors per round.
Apirka socks, my second stranded knitting project

Lesson #3: What's the difference between Fair Isle knitting and stranded knitting?
Both types of knitting involve carrying strands of two different colors of yarn, with some stitches being knit with one color, and others with the other color to create a pattern. In traditional Fair Isle knitting, there are only two colors per round or row. In other types of stranded knitting, there can be more than two colors.

From this second project, I learned that managing loose ends is important. Even with weaving in ends as I went and carrying yarn forward between rounds whenever I could, there were a whole lot of ends left to weave in when the socks were finished!

My third stranded knitting project was a small coffee cup cozy, knit in the round, then steeked and a button band added. It could very easily have been knit without the steeking, but it was designed as a project to let one practice steeking on something smaller and less involved than a sweater. This turns out to be an excellent idea, because the idea of cutting a perfectly good piece of knit fabric is frankly terrifying, even if it only took a few hours to knit it.

Lesson #4: Steeking
It's very important to reinforce the edge to be steeked before you cut it. My pattern used the crochet reinforcement technique, but I would not use it again. Even though this project was knit with very grippy, non-superwash wool, some of the cut ends are looser in the selvedge than I would like. I feel like I have to treat it delicately for fear that they will come out. If I ever have the guts to steek a sweater or other large item, I will definitely machine-sew the edges for reinforcement.

Once you've mastered these four lessons, you know everything I know about stranded knitting, which is enough to impress your knitting friends as well as non-knitters. (That's one thing I love about stranded knitting. It produces a beautiful finished result, which looks complicated, but is really very simple.)

Happy Knitting!

Sunday, November 16, 2014

Sewing pattern for a case for circular needles

I like to have pretty accessories for my knitting. Functional accessories are a requirement, but pretty ones are like the icing on the cake. I mean, you could have cake without icing, but why?

I've been needing a new case for my fixed circular needles for some time. I had sock sizes (sizes US 0 to 4) in another case I'd made, but I had since accumulated several circulars for making hats, and they had no home. I decided I wanted to sew myself a pretty case that would hold all of them together. In my head, I played around with designs, taking ideas I liked from cases I saw on Etsy. I wanted it to have firm interfacing, so it would fold up like a needle wallet. I wanted a snap closure, or a magnetic snap. It would need at least 12 pockets, for the various sizes I already had.

Eventually, I settled on a design. I sketched it out on my handy 1/4" grid paper. I thought through how to assemble it. I pulled out my fat quarter stash (which makes it sound larger than it actually is!) and picked some nice coordinating ones, and I got to work. I was very pleased with the result, and I shared it on an online crafting forum.


Some of my friends there asked for a pattern, so I drew it up, and here's a link for anyone interested. It took me about 5 hours to make, from cutting pieces to finished project. Actually, come to think of, typing up the pattern and drawing all the diagrams took lenger than sewing the case! It's a pretty straightforward little piece. Enjoy!

Friday, March 14, 2014

Evolution of a Knitter's Stash

At one of the knitting groups I attend, I recently met a brand new knitter. She's already been bitten by the bug, and has a pretty bad case of infatuation with her new hobby. Last night, as we were discussing stash, she asked us all (in disbelief), "you guys buy yarn without knowing what you're going to make from it?" Her reply was a chorus of laughter.

It got me thinking about how we acquire stash. Knitters differ from each other in so many ways. Some of us are pickers and some are throwers, some are process knitters and some are product knitters, some only have one or a few WIPs at a time, and some have dozens. But I think we all go through the same stages in the acquisition of stash.

I present you with Katie's hypothetical Stages of Stash Acquisition:

Stage 1: The New Knitter. You buy the yarn for your first project, and you cast on. Maybe you finish it first, maybe you don't, but soon you buy yarn for your second project, and your third. Eventually (probably), you finish these projects, and invariably there is yarn left over. This is the beginning of your stash.

Stage 2: Oooh, I want to knit THAT! You've already got projects going, but a pattern catches your eye, and you just HAVE to knit it. You buy the yarn for it, and the pattern, and you set them aside for a time when you have fewer projects or life stuff going on. Now your stash includes not just leftovers from past projects, but yarn designated for future projects, too.

Stage 3: That Yarn Would Make a Great Hat. You've got projects on the needles, and projects planned already, but you see a gorgeous hank of yarn, and a project idea pops into your head. You may or may not have a specific pattern in mind, but at this point, you know about how much yarn you would need, so buy the yarn anyway, and stash it. Now, your stash includes leftovers, yarn for specific patterns, and yarn for vague future plans. Uh oh.

Stage 4 (terminal): What a Beautiful Yarn! You know you've got plenty of stash already. There are more projects in your queue than you could possibly knit this year (or this decade). But the yarn in front of you is so pretty, so unique, or so special that you just have to buy it, even though you have no clue what you'll make with it. You buy an amount that makes sense to you (enough for a pair of socks, enough for a sweater, or all the seller has, whatever) and it goes straight into stash. Every now and then, you see it there, pick it up, pet it and rub it against your cheek, just enjoying the sensation of it. Yeah, you're an addict.

I would venture to guess that most knitters hit stage 4 before SABLE, but anyone could reach SABLE at any stage. My own personal journey into stash acquisition was fairly quick. I covered stages 1, 2 and 3 in my first year as a knitter. It was probably another year and a half after that before I would admit to myself that I had bought yarn without knowing what I was going to do with it. I am solidly in stage 4 now. However, I still haven't reached SABLE.

What about you? Did you go through these stages? Did I miss something? Let me know what you think of my hypothesis in the comments!

Thursday, May 24, 2012

How to Add Buttons As You Knit

I don't remember where I got this idea. I don't think it came from my own brain, but I'm not sure who properly deserves credit. Oh, well. The gist of it is this: I'm lazy. I don't like sewing on buttons, because it means more ends to weave in. So, for this cardigan I'm knitting, I decided to try adding the buttons as I went.  Note: this will only work for buttons with a shank or two holes. Buttons with four holes cannot be knitted in this way. Well, you could actually add them this way, but they would look funny. You'll see what I mean.


Here's how I did it:
You'll need:

  • Knitting-in-progress to which button is to be added
  • Button(s)
  • A tapestry needle small enough to go through the hole(s) in your button(s)
  • Floss or thread


First, work up to the point that it's time to add a button. Where's that? You'll have to figure that part out yourself. As a general guide, I'd recommend basing it on the pattern's placement of the buttonholes. Once you've decided where, work up to the stitch you want to use to anchor the button. Make sure you are on a right side row, unless you like buttons facing inward. Come to think of it, there may be situations where you want a button on the wrong side, but that's certainly not the norm!

Next, thread a needle with thread of your choice. I used a snippet of dental floss.

Using the needle, pull the floss or thread through the stitch (direction doesn't really matter).

Then, thread the other end of the floss or thread through the needle. Now, you've got the needle pulling the thread, which pulls the stitch. Slip the stitch off the left knitting needle.


Push the tapestry needle through the button shank if you have a shanked button, or from back to front if you have a two-holed button, and pull the thread, then the stitch, through as well.


If you have a two-holed button, you must then repeat this going from front to back through the other hole. Now your button is on the stitch!


Place the stitch back on the left needle, then knit that stitch through the back loop. (Technically, it doesn't matter whether you knit it through the front or back loop, since the button compresses the stitch to the point you can't really tell anyway, but I found it much easier to knit it through the back loop.)


Voila! You have knitted in a button.


Monday, May 7, 2012

My First Trip to Knitting Camp

Never having been to knitting camp before, I was not sure it would be worth the money. But I figured, the price was not much more than I would pay for that many nights' lodging in a comfortable hotel, and I would be surrounded by knitters instead of screaming children, so what was there to lose? As it turns out, I very much underestimated the camp experience.

I had been to innumerable knit nights, to trunk shows, to fiber festivals, to Stitches and to knitting weekends with my buddies, but CampKIP was something else entirely, combining the best (in my humble opinion) features of all of these things into 4 too-short days of pure fiber bliss.

Like a knit-in, camp involved a good-sized group of knitters staying overnight in a retreat atmosphere. But, it was better, because it was more than one night long.

Like a trunk show, there were handknits on display everywhere. But it was better, because there were more of them, by a wide variety of designers and knitted by all the various camp attendees.

Like a fiber festival or Stitches, there was yarn and fiber for sale, and door prizes and raffles. But camp was better because the group was smaller, odds of winning were better, and the vending was not so overwhelming.

There were dozens of knitters from all over the country. We all stayed 3 nights at a retreat, where fabulous meals were provided. Everyone showed off their WIPs and FOs. Lots of people brought spinning supplies (including wheels!) and spun. People shared equipment, like their spinning wheels, yarn winders, scales and swifts, even a drum carder! People gave each other impromptu lessons on all kinds of techniques. Each evening, there was a raffle of 15-20 door prizes. There was a scavenger hunt for additional raffle tickets and prizes. There was a bonfire at which marshmallows were roasted and  s'mores were made. For those willing to pay a bit extra, massages, a wine tasting and a beer tasting were available. On vendor day, sumptuous yarns, luscious fiber, and useful equipment were sold.

It was a yarn fanatic's paradise, I tell you! If you ever get the chance to go to a knitting camp or retreat, drop everything and GO!

Thursday, March 29, 2012

Diagnosis: Stashitis. Prognosis: Grim.

Stashitis: inflammation of the stash.

I might have too much yarn. Knitters who read this will know that there is no such thing. But non-knitters, such as my husband, are fond of pointing out that a person who acquires yarn faster than she can knit it, who runs out of storage space for said yarn, or who isn't even sure where all the yarn is, has a problem.

I call this problem stashitis. My stash is inflamed. It has swollen to the point of causing problems.

So, how does one treat stashitis? The surgical option, stashectomy, is just too painful to contemplate. Besides, it might be life-threatening. How can a knitter live without a stash? But the lifestyle treatment is very difficult indeed: a yarn diet. One must knit more yarn than she takes in, and continue to do so for months, even years, until the stash shrinks to a manageable level. This can have side effects.

Queueitis: inflammation of the queue.

As I try to come up with projects for all the yarn in my stash, I notice that my Ravelry queue is lengthening. I am spending valuable free time, potential knitting time, browsing for just the right pattern, and adding patterns to my queue and my library.

And how does one treat queueitis? Assuming for the moment that stashectomy is still not a consideration, there is only one treatment. Casting on. Start the queued projects. This leads inevitably to...

WIPitis: inflammation of the WIPs (works in progress).

Alas, I have a rule about WIPs. To prevent myself from developing WIPitis, which I recognize as a very real danger to me, I have a rule (okay, more like a guideline, but I really do generally stick to it) that I may not have more than two WIPs at a time. Once I have started two projects, I must finish one before I can start something new.

So, I have stashitis, which leads to queueitis, and I have the Two-WIPs-at-a-time rule to prevent WIPitis. Stashectomy is too painful to contemplate. I haven't got enough self-control to stick to a yarn diet. There is only one cure.

KNIT FASTER!

Wednesday, March 14, 2012

On knowing when to let go

I don't frog often. I tink a lot, and I correct a lot of mistakes in various other ways, but I rarely frog. I especially hate completely unraveling an entire project. So when I have a project that clearly won't work out and needs frogging, I have to prepare myself first. I go through a mourning period for the item I had imagined, but that will never take shape. I hope I'm not the only crafter who does this.

I recently frogged my Bex socks. The pattern, by Cookie A, is lovely, with complicated, symmetrical cables that form a diamond-like pattern with ribs of varying widths. Most of the cabling is not very difficult, although there is one complex cable I ran across.

But, for whatever reason, I just didn't enjoy knitting it. The cables are on every single row, which means the progress is especially slow. In the end, I decided the finished socks wouldn't justify the frustration I was experiencing.

So, after about 10 days' mourning, prayer, fasting and soul-searching (okay, I exaggerate, but there really was mourning and soul-searching involved), I declared the socks beyond hope of recovery. I unplugged the needles, removing them slowly and with a heavy heart. Then, I watched as, stitch by stitch, my hands unraveled my work and wound it back into balls of yarn. Unraveling the cast-on was like seeing my project take its last breath. It was sad, but I knew the yarn was in a better place, ready to become something else, something that would inspire joy.

I am at peace with it.