My first project was a little case for my mp3 player. (Yes, I started this post so long ago, I actually owned and used an mp3 player because my cell phone didn't have the memory capacity to hold my favorite playlist!) I learned a few things from that project, most notably that tight floats can make your project too small, and that there are several ways to hold two different yarn strands while knitting.
Lesson #1: Avoiding tight floats
 To avoid tight floats in stranded knitting, after you've cast on, joined in the round, and knit a row or two, let the knitting turn inside out. Stranded knitting is typically done in stockinette, which naturally wants to curl. The result of doing this will be that you are still knitting (as opposed to purling) every stitch, but you'll be working on the needle that is in the back, with rest of the work hanging down in front of it. It's a little strange at first, but you get used to it. The floats will be on the outside, which has a slightly greater circumference. When you finish and turn the knitting right-side-out again, your floats will be looser than if you had knit right-side-out the whole time.
Lesson #2: Holding two working yarn strands
 |
| A Norwegian thimble |
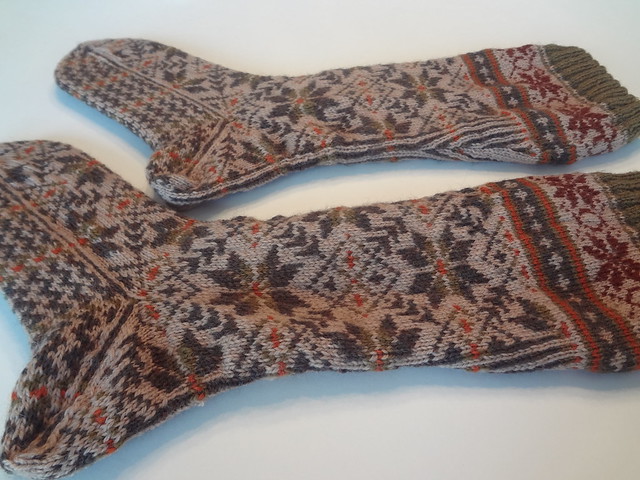
My next stranded knitting project was a pair of socks sold as a kit, with the pattern and all the yarn included. It involved 5 different colors of yarn, but no more than two colors per round.
 |
| Apirka socks, my second stranded knitting project |
Lesson #3: What's the difference between Fair Isle knitting and stranded knitting?
Both types of knitting involve carrying strands of two different colors of yarn, with some stitches being knit with one color, and others with the other color to create a pattern. In traditional Fair Isle knitting, there are only two colors per round or row. In other types of stranded knitting, there can be more than two colors.
From this second project, I learned that managing loose ends is important. Even with weaving in ends as I went and carrying yarn forward between rounds whenever I could, there were a whole lot of ends left to weave in when the socks were finished!
My third stranded knitting project was a small coffee cup cozy, knit in the round, then steeked and a button band added. It could very easily have been knit without the steeking, but it was designed as a project to let one practice steeking on something smaller and less involved than a sweater. This turns out to be an excellent idea, because the idea of cutting a perfectly good piece of knit fabric is frankly terrifying, even if it only took a few hours to knit it.
Lesson #4: Steeking
It's very important to reinforce the edge to be steeked before you cut it. My pattern used the crochet reinforcement technique, but I would not use it again. Even though this project was knit with very grippy, non-superwash wool, some of the cut ends are looser in the selvedge than I would like. I feel like I have to treat it delicately for fear that they will come out. If I ever have the guts to steek a sweater or other large item, I will definitely machine-sew the edges for reinforcement.
Once you've mastered these four lessons, you know everything I know about stranded knitting, which is enough to impress your knitting friends as well as non-knitters. (That's one thing I love about stranded knitting. It produces a beautiful finished result, which looks complicated, but is really very simple.)
